- Mark as New
- Bookmark
- Subscribe
- Permalink
- Report Inappropriate Content
Other Questions
Hello there, @ShevFamilyFdn. Welcome to the Community.
I understand how inconvenient it can be when QuickBooks Desktop (QBDT) suddenly isn't recognizing your printer, especially since you've already tried several steps to get it working. Let's go through some troubleshooting together to get this resolved.
Step 1: Run the QuickBooks Tool Hub.
The Tool Hub helps fix common errors. For the best experience, we recommend you use Tool Hub on Windows 10, 64-bit.
Here's how:
- Close QuickBooks.
- Download the most recent version (1.6.0.3) of the QuickBooks Tool Hub. Save the file somewhere you can easily find it (like your Downloads folder or your Windows desktop).
Note: If you've installed Tool Hub installed, you can find out which version you have. Select the Home tab. The version will be on the bottom. - Open the file you downloaded (QuickBooksToolHub.exe) and follow the on-screen steps to install and agree to the terms and conditions.
- Once installed, double-click the Tool Hub icon on your Windows desktop to open it.
Note: If you can't find the icon, do a search in Windows for QuickBooks Tool Hub and select the program.
Step 2: Use the Print and PDF Repair tool
- In the QuickBooks Tool Hub, select Program Problems.
- Choose QuickBooks PDF & Print Repair Tool.
- Wait about a minute for it to run, then try printing again.
If issue still persist, you can rename the QBPrint.QBP file. QBDT keeps a small file that remembers your printer settings. If that file gets damaged, QuickBooks may not recognize your printer. Renaming it tells QuickBooks to create a new, clean version, which clean the issue right away.
Here's how:
- Close your QBDT.
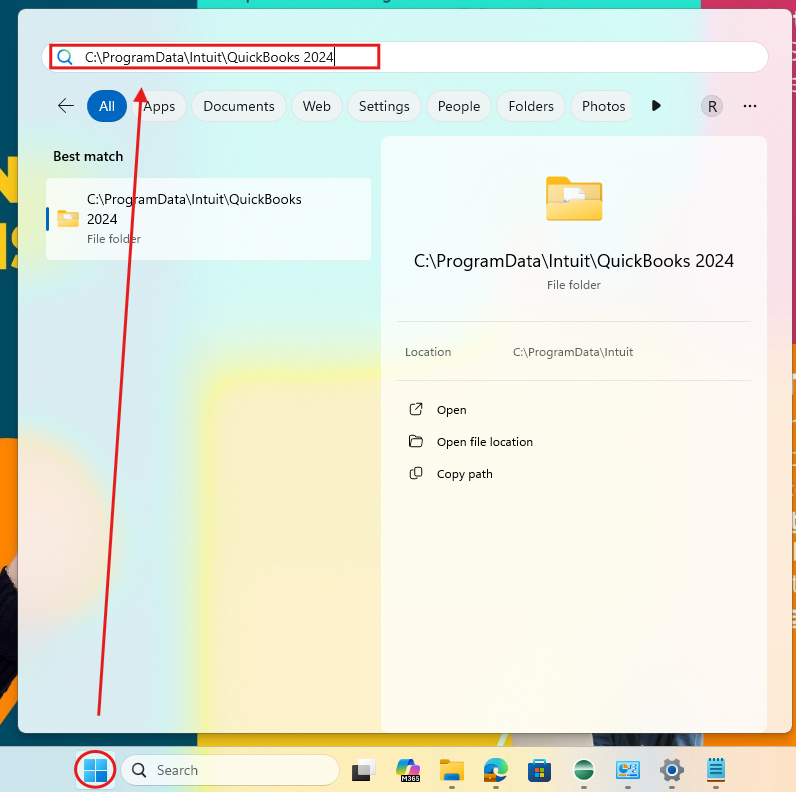
- Click the Window icon of your computer.
- Type in C:\ProgramData\Intuit\QuickBooks <year> (example: C:\ProgramData\Intuit\QuickBooks 2024 ) then hit enter.
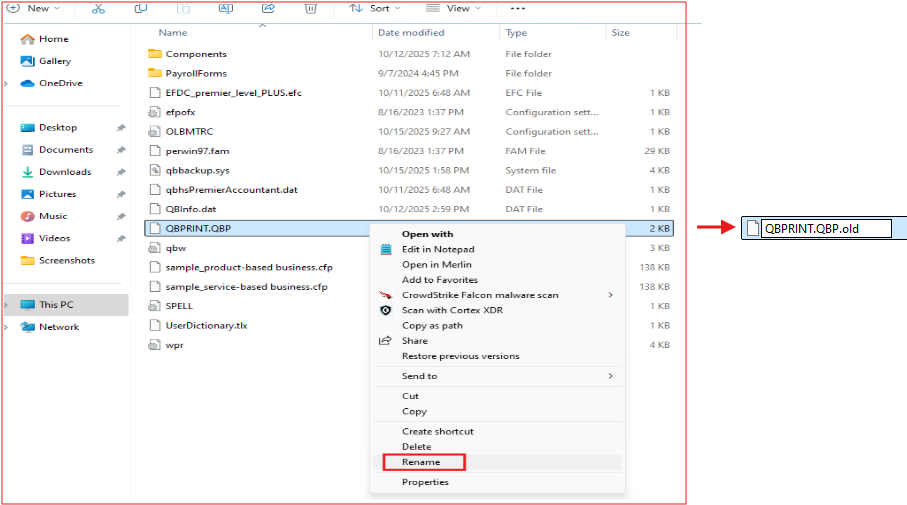
- Find the file named QBPrint.qbp, then right-click and rename it to QBPrint.qbp.old.
- Reopen QuickBooks, then go File and select Printer Setup.
- Choose any transaction in the Form Name list and select OK. This will create a new QBPrint.qbp file.
Note: You don't have to do this for every transaction. - Try printing a transaction again.
If you have any follow-up questions, please don't hesitate to click the Reply button.
