Turn on suggestions
Auto-suggest helps you quickly narrow down your search results by suggesting possible matches as you type.
Showing results for
BLACK FRIDAY SALE 70% OFF QuickBooks for 3 months* Ends 11/30
Buy nowIt's nice to see you here, @Child of God,
Let's make sure you're able submit your payments in QuickBook using the new password. Please note that if you recently updated the bank account for e-payments, the IRS will provide a new set of PIN for it. This is normally the reason why some users are still getting issues when sending their payments to the agency.
Then you need to update it in QuickBooks using the steps in this article: Change bank account you use to make e-payment for tax liabilities
After getting the correct PIN and updated the Internet Password, you also need to update this information inside QuickBooks. Use the steps below:
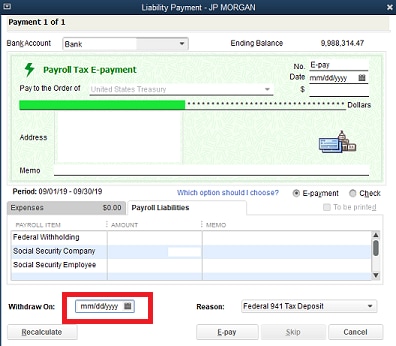
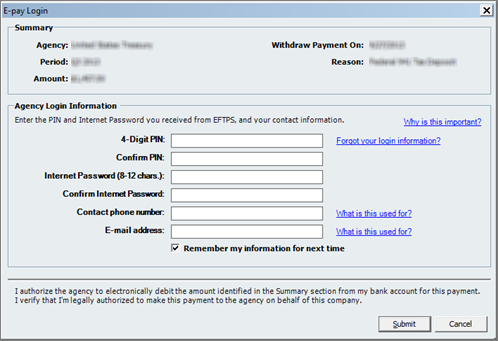
The next time you make e-payment, re-enter your 4-Digit PIN and EFTPS Internet password, and select the Remember My Information for next Time option.
Check out the following links to guide you with the process:
If the same issue happens again, I recommend reaching out to our Support Team. They can initiate a viewing session with you and help diagnose the company file to verify what causes the problem. If needed, they can also report this to our engineers for further investigation.
Refer to this article for our contact options and support availability: Contact QuickBooks Desktop support
Let me know how it goes. I'll be right here if you have any questions or need any help with your tax filings. Have a lovely week ahead!