- Mark as New
- Bookmark
- Subscribe
- Permalink
- Report Inappropriate Content
Other questions
I can see how difficult t this has been, clfp.
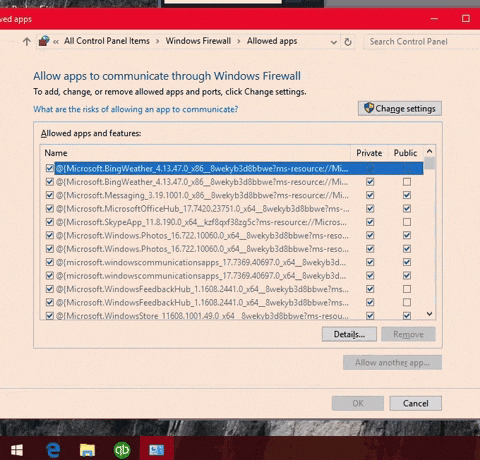
Since the local back up failed, we'll need to check your firewall to make sure important files are allowed. Here's how:
- Press the Windows key on your keyboard, and type Firewall in the search field.
- Select Allow an app through Windows Firewall, then Allow another app.
- Select Browse and go to Program Files(x86)\Common Files\Intuit\Data Protect.
- Select QBIDPservice.exe, then Open.
- Select Network types and select the Private checkbox. Select Add.
- Repeat steps 4 and 5 for the files IBUenghost.exe and IntuitDataProtect.exe. If you get a message saying the files already exist, you’re all set.
These files can also be blocked by third-party antivirus software on your computer. Let's make sure these files are allowed. If you're not sure how to do this, contact the software developer. Simply follow the steps in this article for additional troubleshooting steps:: Unable to backup with Intuit Data Protect.
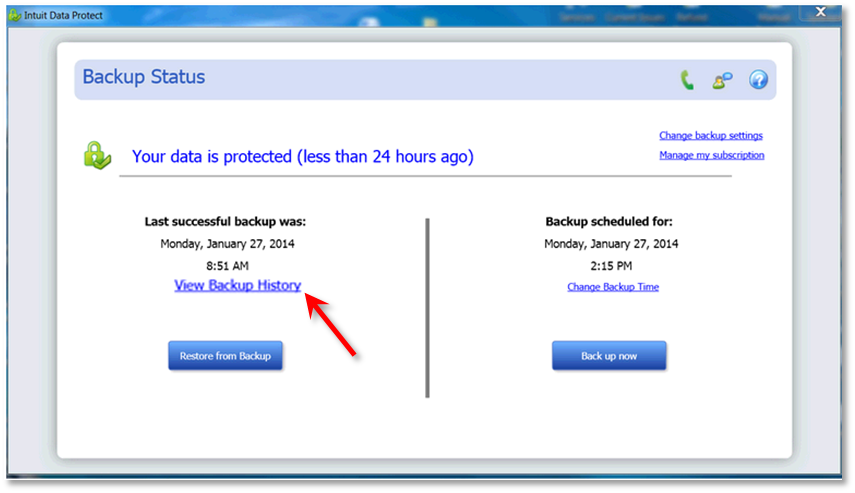
To check the backup status, view the backup history, and change the backup setting, we'll need to access Intuit Data Protect (IDP). When you select View Backup History, you'll be taken to the Backup Details page, which displays a list of your backups in chronological order, from oldest to newest. Scroll through the history to find the backup entry with the correct date and time. Here's how it's done:
- Open Intuit Data Protect.
- Select View Backup History from the Main Intuit Data Protect window.
When you select Change Backup Settings, you can add or remove files from your backup set and change your email notification preferences. Let me show you how:
- Open Intuit Data Protect.
- Select Change backup settings.
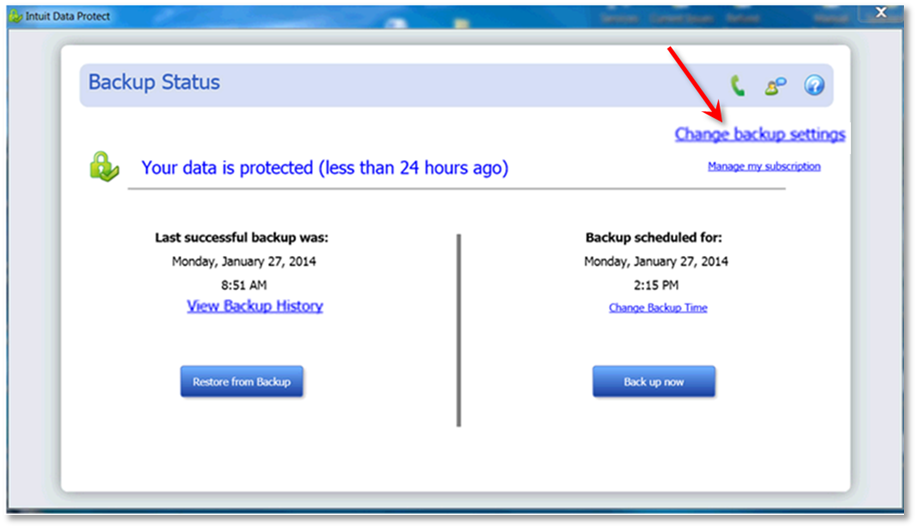
- On the Select QuickBooks Data window, choose the files you want to backup, then select Continue. Note: For Entire PC Users, after you choose Continue, select the additional folders you want to back up on the Select other folders to back up window.
- Click Continue. On the Notifications Email Settings window, choose whether to be notified or not.
- Tap Continue again, then choose your backup time.
- Press Continue to save the changes, then exit from the settings window.
Furthermore, I like you to check IDP system requirements if you need to review its specifications and answers to common questions about this service:
Feel free to comment if you need more assistance backing up your QBDT data with IDP. I'm always here to help you more.
