- Mark as New
- Bookmark
- Subscribe
- Permalink
- Report Inappropriate Content
Printing multiple (duplicate, triplicate) copies of an invoice
GST rules stipulate that a business must issue invoices in multiple copies. QuickBooks now offers this feature. You can print multiple copies of an invoice, each with a special watermark. You can choose to print from 2 – 3 copies. The watermark can even be customised.
Note - The watermark will not display when printing invoices that use imported invoice styles.
To print multiple copies of an invoice:
- With your invoice open, click Print or Print Preview.
- Click the drop-down beside the Print button, and select from the following print options:
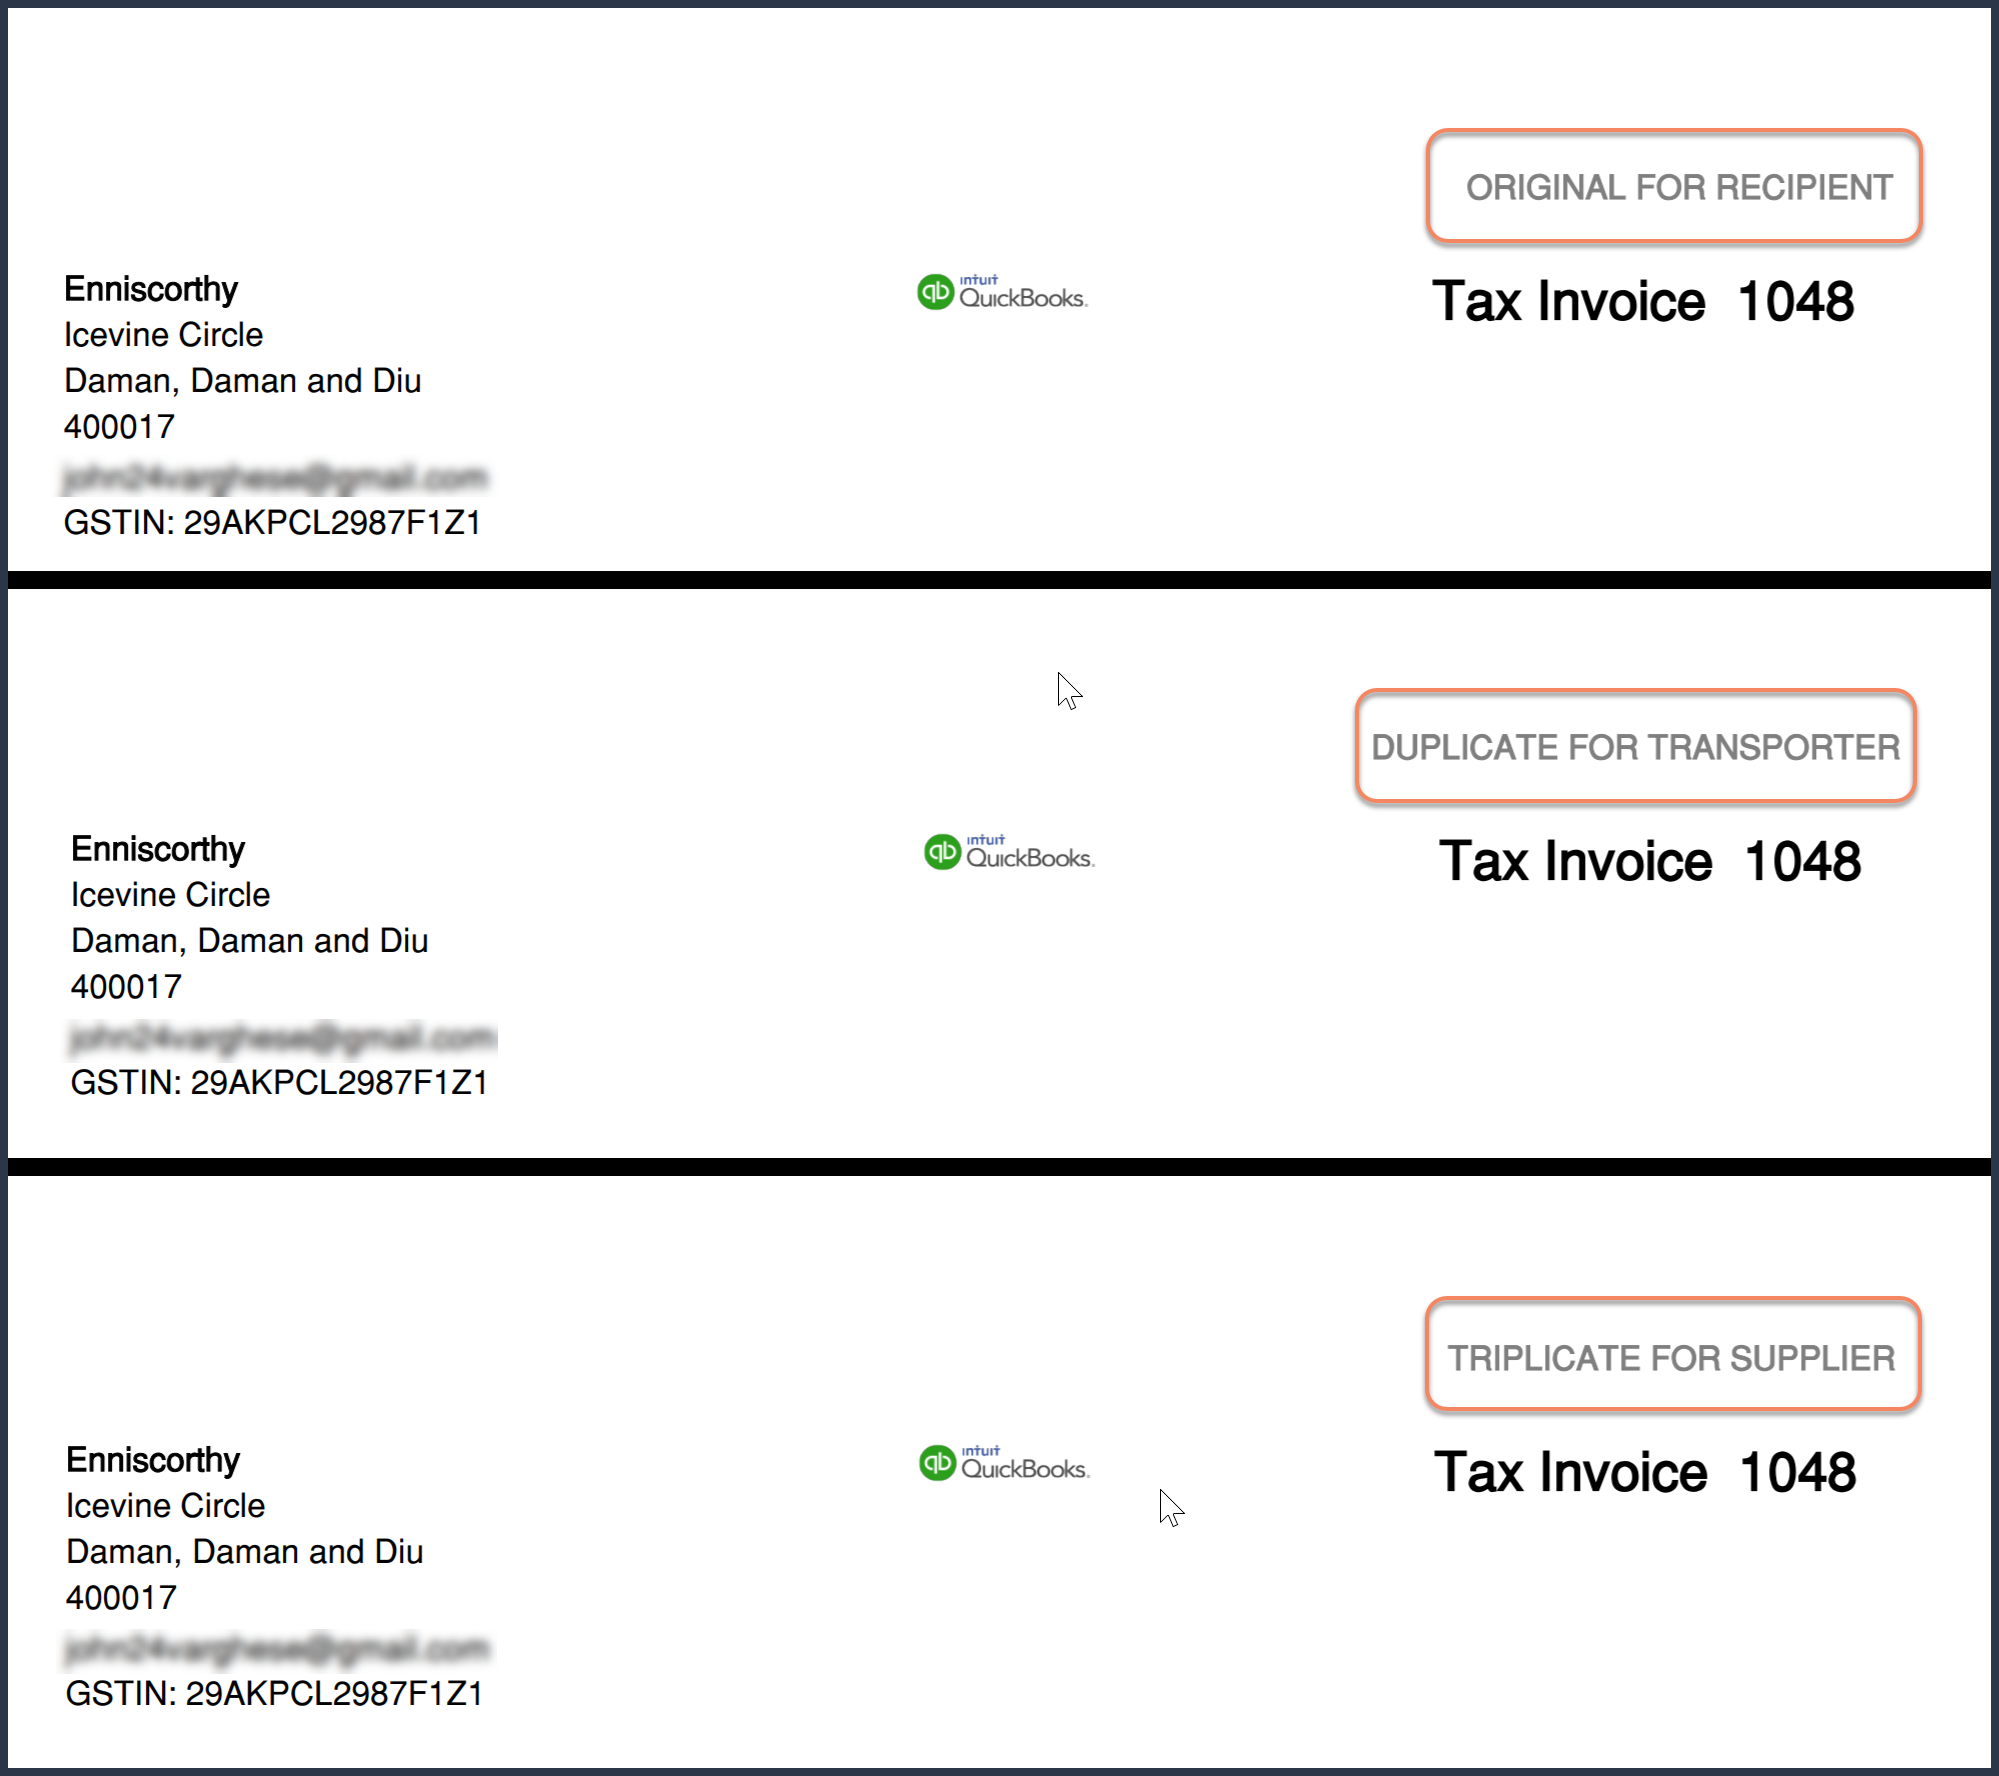
- Original, Duplicate and Triplicate (default) - This option prints 3 copies and is typically used by businesses that sell goods. Each copy of the invoice prints a watermark in the top right corner, like you see in the pictures below:
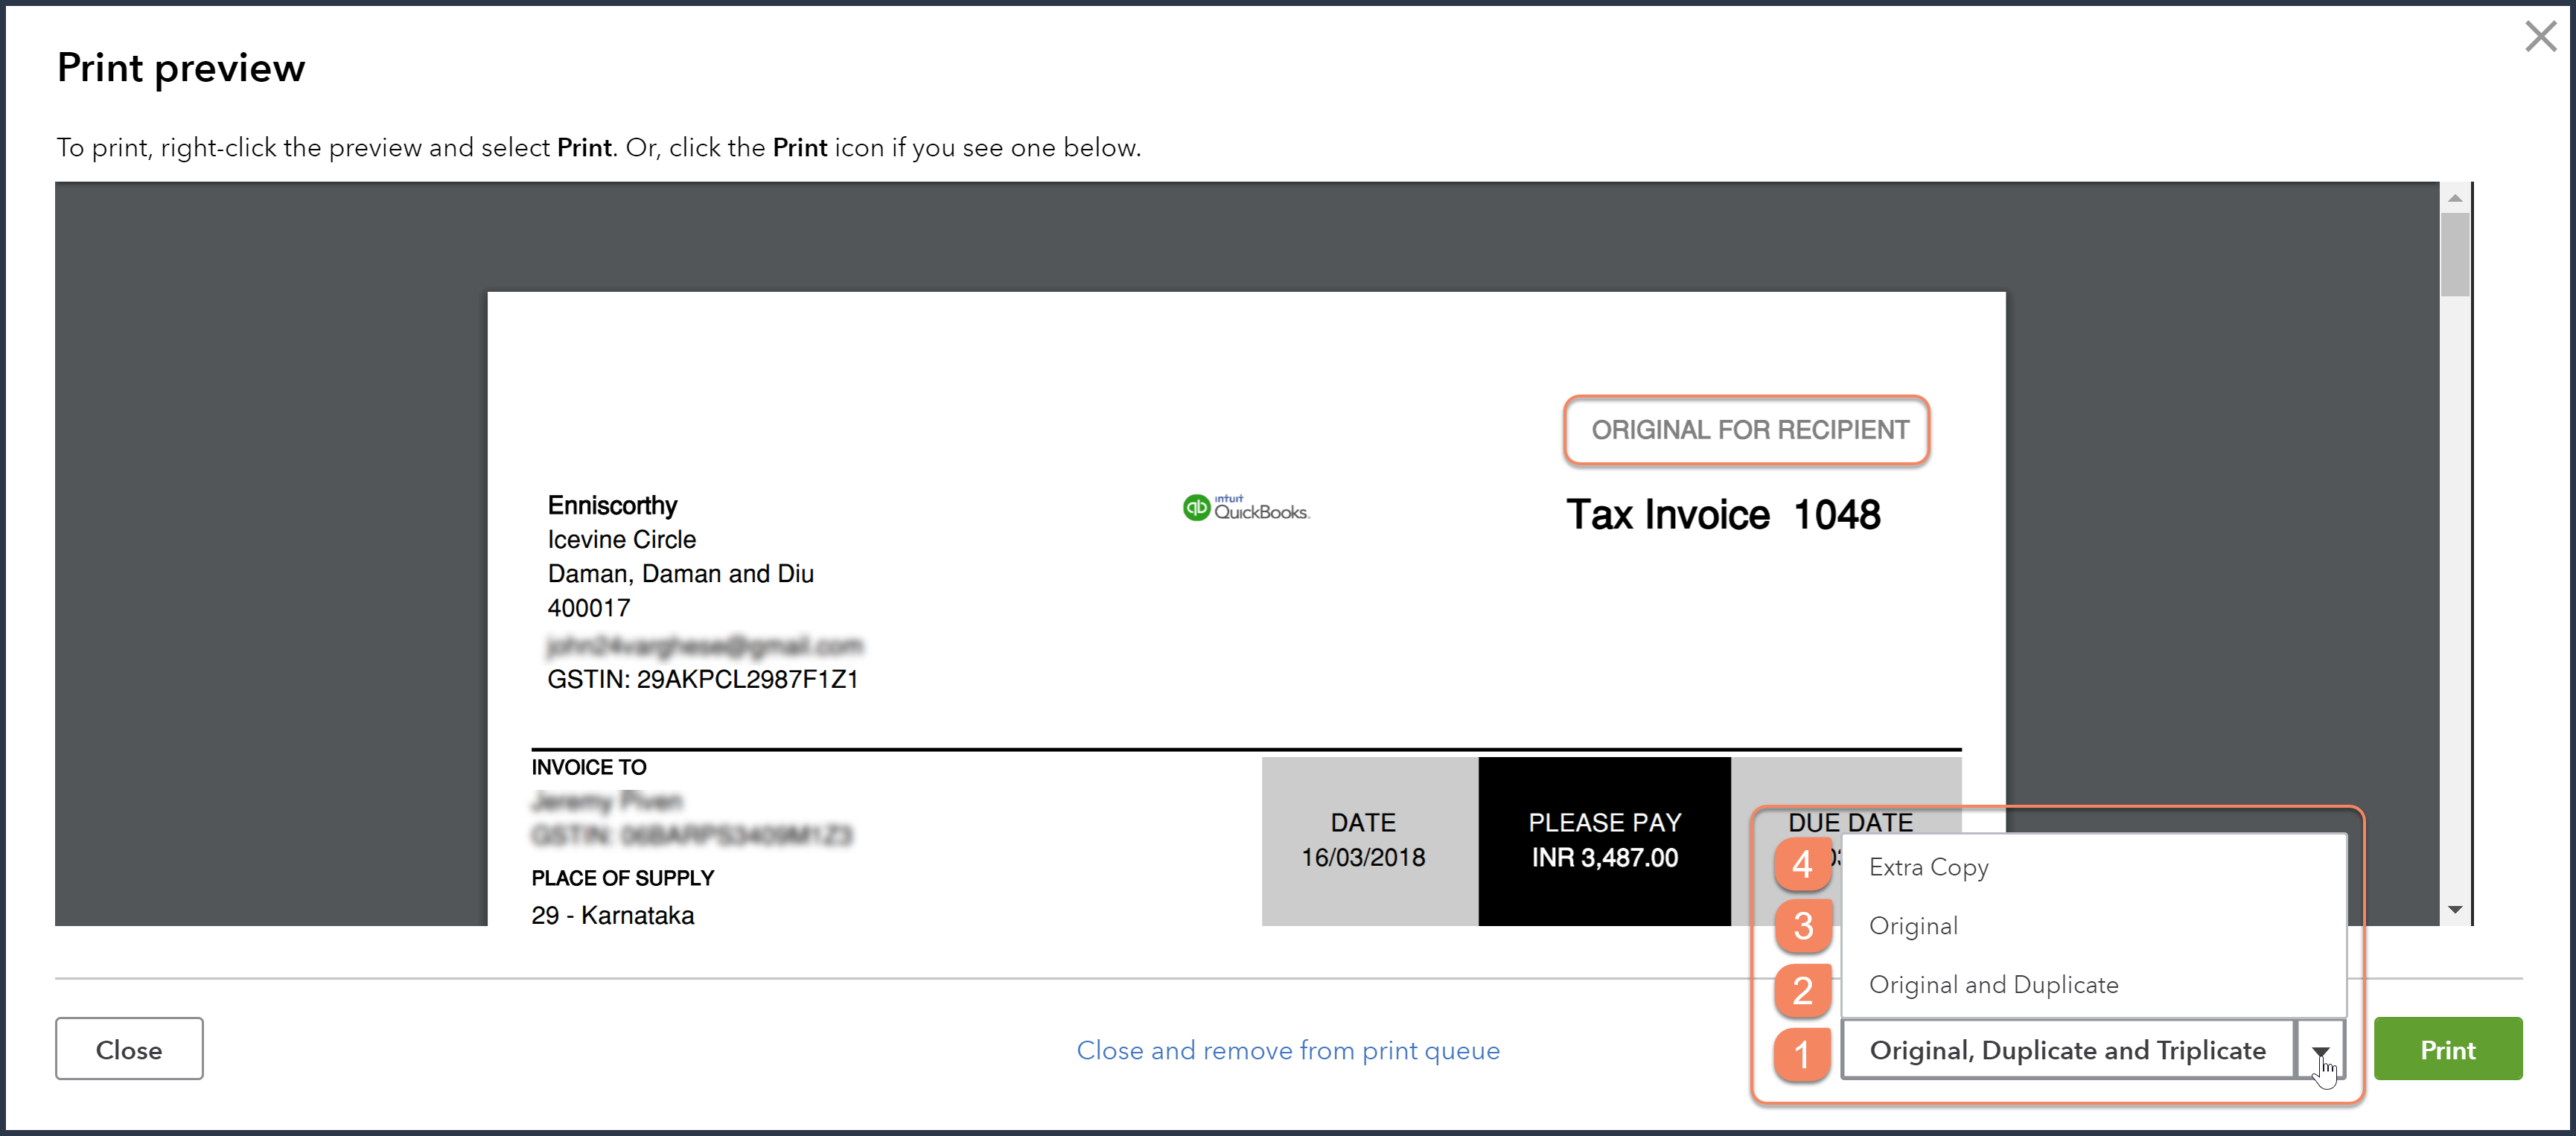
- Original and Duplicate - This option prints 2 copies and is typically used by businesses that sell services. Watermarks are printed in the top right corner of the invoice.
- Original - This option prints 1 copy with a watermark in the upper right corner of the invoice.
- Extra Copy - This option prints a 1 copy without a watermark.
- Original, Duplicate and Triplicate (default) - This option prints 3 copies and is typically used by businesses that sell goods. Each copy of the invoice prints a watermark in the top right corner, like you see in the pictures below:
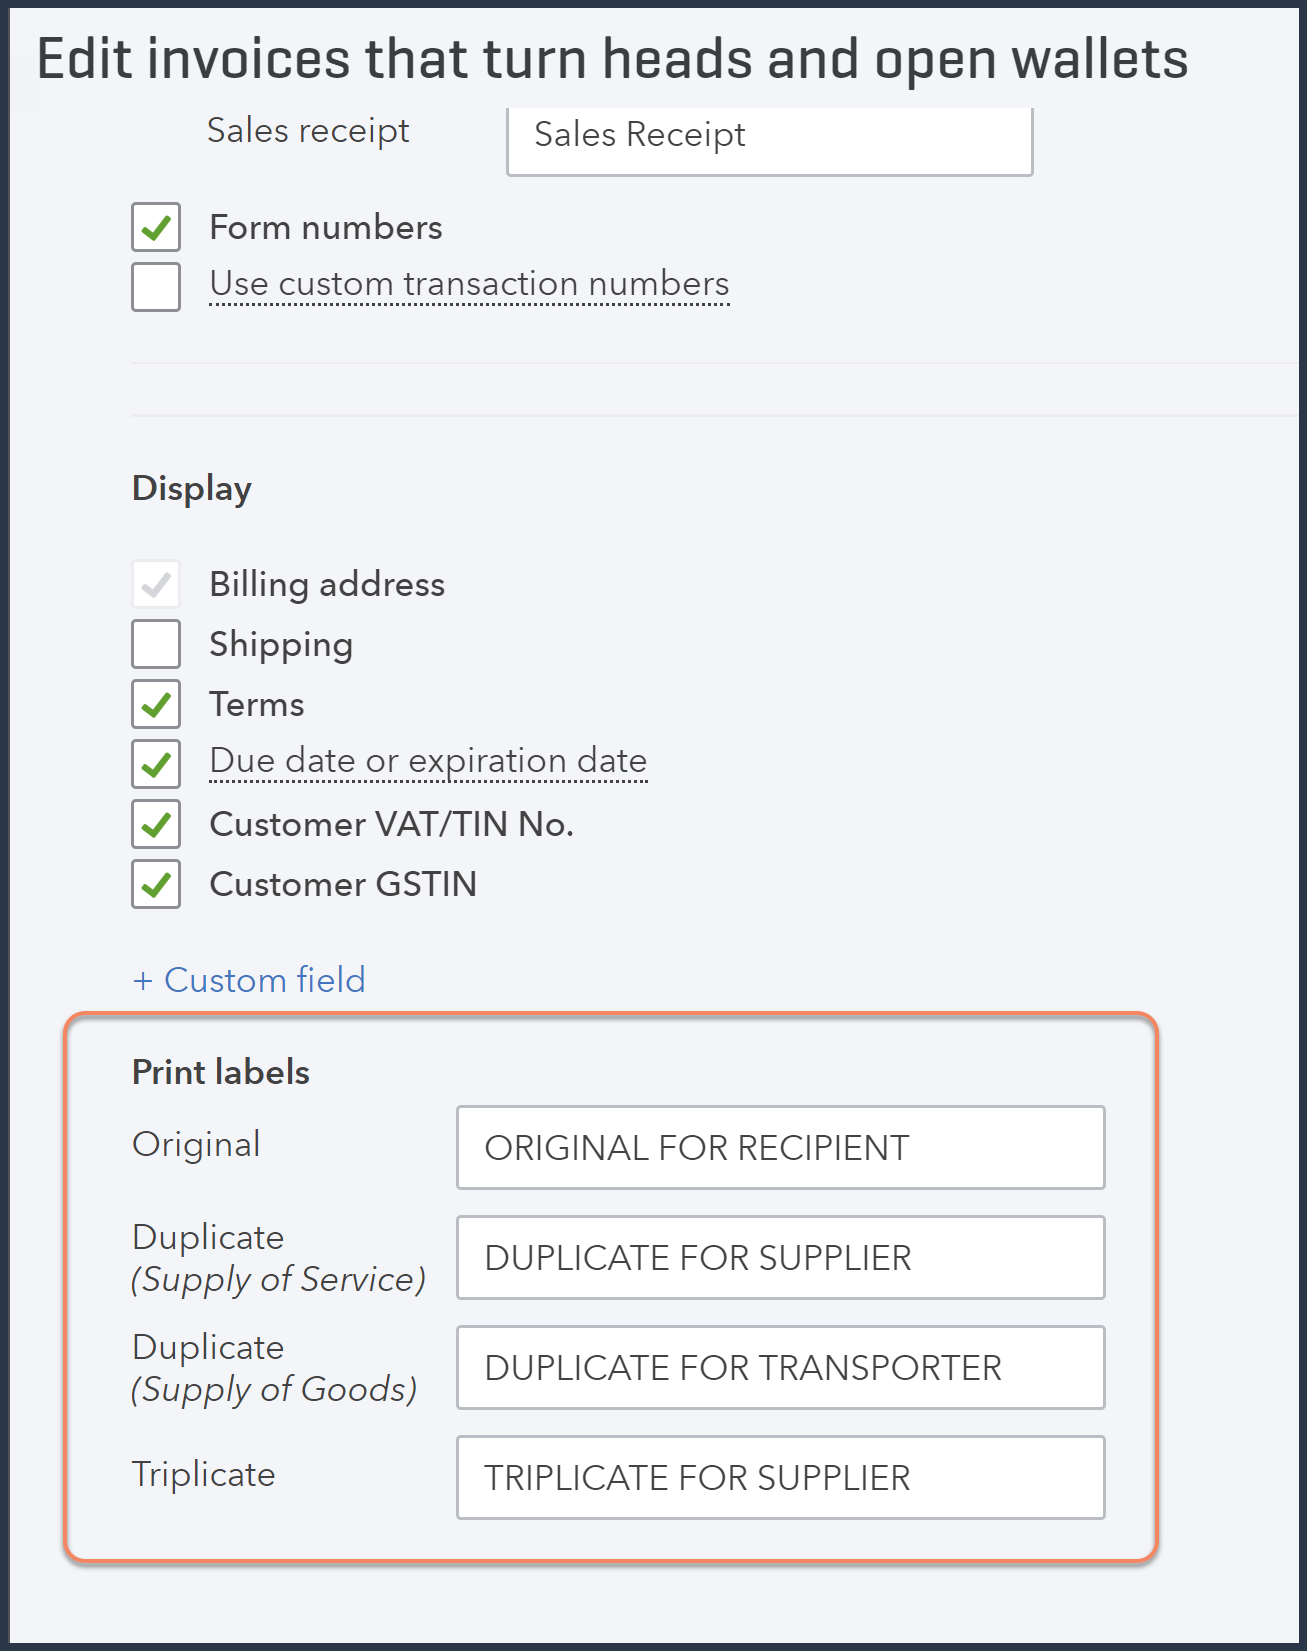
To change the text of the watermark:
- With the invoice open, click Customise at the bottom of the invoice and select Edit current.
- Click the Content tab and then click the header section on the right.
- On the left, scroll down to the bottom to Print labels and change the label name to what you prefer.
- Do not use special characters ( example / @ # $ % ^ & * \ )in the label names! It may lock you out of the Custom Form Styles page!
- Click Done.
You can also change watermarks from the Gear icon.
- Click the Gear icon and select Custom Form Styles.
- Locate the Standard/Master form style.
- In the Action column, click Edit.
- Click the Content tab and then click the header section on the right.
- Scroll down to the bottom to the section named Print labels.
- Update the label names and click Done.
Labels:
