
Turn on suggestions
Auto-suggest helps you quickly narrow down your search results by suggesting possible matches as you type.
Showing results for
Organizing your financial transactions is key to gaining deeper insights into your income and expenses. Let's create sub-classes so you can further organize your transactions, Odette.
In QuickBooks Online, you can use sub-classes to organize your transactions further, as they allow you to categorize and track detailed financial information within main classes, providing more insights into your income and expenses.
Here's how to create one:
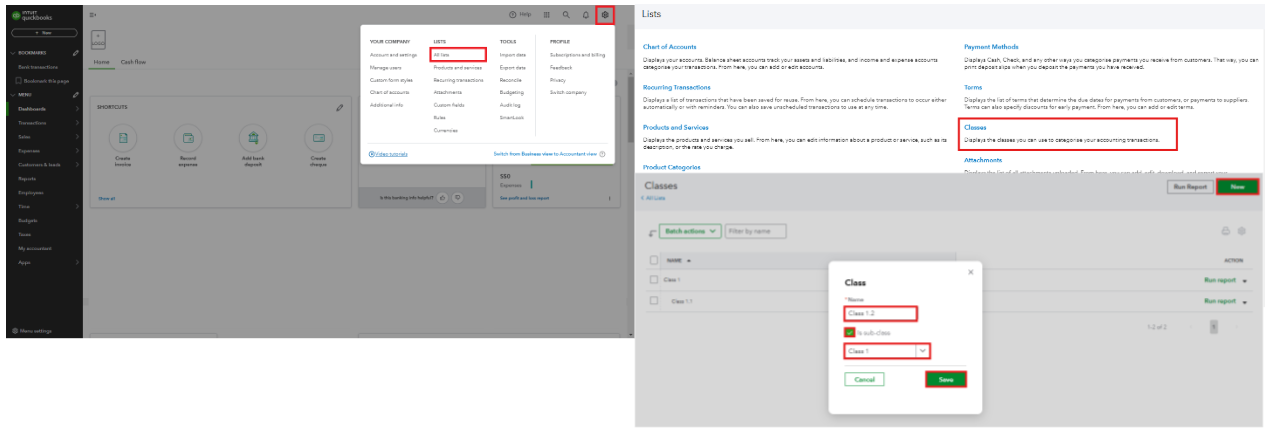
For more info on managing classes, check out this article: Create and manage classes in QuickBooks Online.
Once set up, refer to this article on assigning classes to transactions: Track your transactions by class in QuickBooks Online.
You're now equipped to organize your financial transactions better, Odette. If you ever encounter a question or need further guidance in managing transactions in QuickBooks, I'm just a post away.
You have clicked a link to a site outside of the QuickBooks or ProFile Communities. By clicking "Continue", you will leave the community and be taken to that site instead.
For more information visit our Security Center or to report suspicious websites you can contact us here